Installing a built-in charging station is a smart move for electric vehicle owners. It’s a way to charge your car at home, which is what most drivers prefer. A built-in charging station, or charging hub, makes charging easy and saves money.
We’ll show you how to install a built-in charging station. You’ll learn about the benefits of charging at home and the types of stations available. We’ll also cover what tools and materials you’ll need.
Our aim is to give you a detailed guide to installing a built-in charging station. This will help you make a smart choice and ensure a safe setup. With more people driving electric cars, having a good charging system is key.
Key Takeaways
- Installing a built-in charging station can be a convenient and cost-effective way to charge your electric vehicle.
- A built-in charging station, or charging hub, can provide a range of benefits, including convenience and cost-effectiveness.
- Over 90% of electric vehicle drivers want to charge their vehicles at home.
- The cost to install a Level 1 charging station typically ranges from $0 to $300.
- Hiring a licensed electrician with EV-specific certifications is essential to mitigate risks associated with improper installations.
- High-quality wiring contributes to efficient energy transfer, reducing energy waste and enhancing the overall effectiveness of the charging system.
- A built-in charging station can provide a range of 2 to 5 miles per charging hour, making it suitable for daily commutes.
What is a Built-in Charging Station?
A built-in charging station is a device for charging electric vehicles at home. It’s important to know what it is and why it’s useful. We install custom-built homes with features like USB charging stations. This makes it easy for homeowners to charge their devices.
Using a built-in charging station is convenient and saves money. You can charge your vehicle anytime you want. Key features include:
- Compact design for easy installation
- Works with many devices, like electric vehicles and phones
- Has safety features, like secure wiring
Choosing the right built-in charger is important. There are different types, from Level 1 to Level 3. You can pick one that fits your vehicle and home’s electrical system. A USB charging station is also great for charging many devices at once.
Knowing the benefits and features of built-in charging stations helps you make a good choice. Our team is ready to install one for you. We ensure it’s safe, efficient, and meets your needs.
| Charging Level | Maximum Current | Voltage | Power Output |
|---|---|---|---|
| Level 1 | 24 amps | 120 volts | 2.88 kW |
| Level 2 | 32 amps | 208/240 volts | 7.68 kW |
| Level 3 | 400 amps | 480 volts | 332.6 kW |
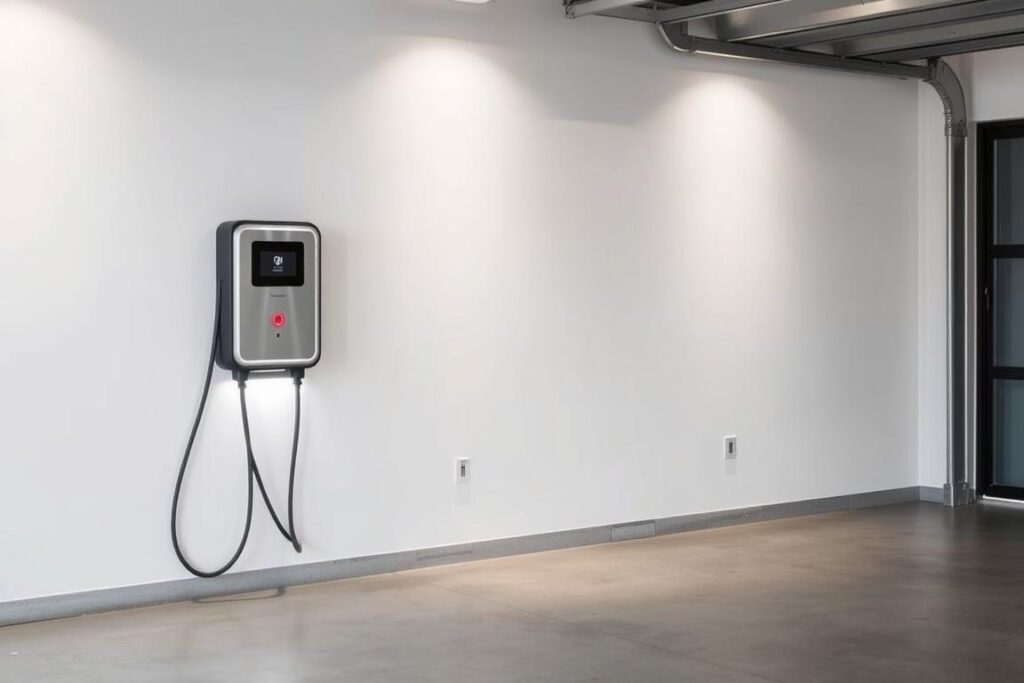
Choosing the Right Location
Finding the perfect spot for your built-in charging station is key. It must be safe and efficient. Think about how close it is to your car’s charge port and if there’s a 240V outlet nearby. Also, make sure it’s easy to get to.
Garages, carports, or special parking spots are great places to put it. When picking a spot, keep these things in mind:
Factors to Consider
- How close it is to your car’s charge port
- If there’s a 240V outlet nearby
- How easy it is to get to
- How convenient it is for users
Popular Locations for Installation
When picking a spot, think about the benefits of wall-mounted or integrated charging stations. They’re easy to use and look good. The right spot and type of station make charging safe and easy.
Types of Built-in Charging Stations
Exploring built-in charging stations, we find many types. A wireless charging station is great for many homes. We have wall-mounted, integrated furniture, and multi-device charging stations. These built-in charger systems are sleek and modern.
Some benefits include:
- Convenience: Charge many devices at once with a multi-device charging station.
- Space efficiency: Wall-mounted options are perfect for small spaces.
- Sleek design: Integrated furniture solutions provide a modern look.
When picking a charging station, think about your devices and home space. A wireless charging station is perfect for a clean charging area. Our built-in charger systems are safe and efficient for all devices.
We focus on making customers happy and offering quality. Our team is ready to help with your charging needs. We have a wide range of built-in charger systems, including wireless charging station options for everyone.
Tools and Materials Needed
Installing a built-in charging station needs the right tools and materials. Use a heavy-duty power strip with many plugs and USB points. This fits all your chargers, making it a handy spot for charging at home.
For a safe and good installation, you’ll need:
- 240V outlet
- Circuit breaker
- Wire
- Heavy-duty hinges and magnetic latch for security and easy access
- Velcro cord organizers for managing extra wire
Also, think about using a French cleat for wall mounting. This is good when you can’t reach two studs. With the right tools and materials, you’ll have a useful charging spot that keeps your devices charged and ready.
Preparing for Installation
Before we install a built-in charging station, we need to check our space and electrical setup. The U.S. Department of Energy says there are 172,323 EV charging ports now. They expect 33 million EVs by 2030. We must follow local codes and check the electrical panel to meet building codes.
A wall-mounted charging station is handy, but we must think about the distance to the electrical panel. This affects the cost. Also, where we place the station is important, as it can raise costs without making it easier to use.
Some important things to think about when getting ready for installation are:
- Looking at the space to find the best spot for the charging station
- Checking the electrical panel to make sure it meets current codes
- Looking at local rules to make sure the installation goes smoothly
By considering these points, we can make sure our built-in charging station is installed right. This includes wall-mounted or other types. For more on plumbing services, visit LH Builders Inc.
Step-by-Step Installation Guide
When we install our integrated charging station, we must follow each step carefully. This ensures safe and efficient charging. First, turn off the power to the area where the station will go. This step is crucial to avoid electrical shocks or injuries.
Then, we mount the charging station. It could be a wireless or wired one. We attach it to a wall or post, making sure it’s secure and level. It’s also important to place it where it’s easy to charge our electric vehicles.
Key Installation Steps
- Turn off the power supply to the area
- Mount the charging station, which can be an integrated charging station or a wireless charging station
- Connect the wiring, ensuring all connections are secure and meet the necessary electrical standards
By following these steps and taking the necessary precautions, we can ensure a safe and successful installation. The installation process might change based on the charging station type and our home’s electrical setup.

Testing Your Installation
Testing your built-in charger is key to making sure it works right. Reports show 92% of EV users need reliable charging stations. So, we suggest checking for any problems during the test.
Studies say 78% of EV drivers have had charger issues. To prevent this, test your charging hub early. Look out for compatibility, electrical overload, and communication errors.
Here are some steps for testing your installation:
- Visual inspections to identify common EV charger issues
- Checking for electrical overloads and tripped breakers
- Testing the charging hub with different EV models to ensure compatibility
By following these steps and using diagnostic tools, you can make sure your charger works well. Regular updates from makers, like Enel X, can boost charger performance by 45%.
A well-tested charging station is key for a smooth EV charging experience. By focusing on testing and upkeep, you get the most from your charger. Plus, you help the environment by using a sustainable transport option.
| Charger Type | Cost Range | Installation Cost |
|---|---|---|
| Level 1 | $0 – $900 | $400 – $600 |
| Level 2 | $380 – $690 | $1,300 |
| DC Fast Charger | $38,000 – $90,000 | $20,000 – $60,000 |
Safety Tips for Using Built-in Charging Stations
Using built-in charging stations and USB charging stations is a big part of our daily lives. It’s key to keep our homes and devices safe. Here are some safety tips to remember when using built-in charging stations.
Preventing Overcharging
Follow the maker’s rules for your built-in charging station to avoid overcharging. Overcharging can harm your battery, cause it to get too hot, and even start fires. Use a timer or a smart charging station that stops charging when your device is full.
Fire Safety Precautions
Fire safety is very important when using built-in charging stations. Keep a fire extinguisher close by. Make sure your charging station is in a place with good air flow. Don’t overload your charging station with too many devices, as it can raise the fire risk.
Here are more safety tips:
- Check your charging station and devices often for damage or wear
- Don’t use damaged or frayed cords, as they can cause fires
- Keep your charging station away from things that can catch fire, like curtains or bedding
Maintaining Your Charging Station
As we use electric vehicles more, keeping our charging stations in good shape is key. We suggest cleaning and looking after them often. This helps avoid problems and keeps your wall-mounted or integrated charging station working well.
Here are some tips for keeping your charging station in top shape:
- Regularly clean the charging station every 1-3 months
- Use protective covers to stop moisture damage
- Charge during off-peak hours to save up to 40% on electricity
We also recommend getting professional help every 2-3 years. This can stop 80% of problems and keep your station running smoothly. By following these tips, you can make your charging station last longer and work better.
By focusing on maintenance, you can avoid common problems. This ensures your charging station is safe and works well.
| Maintenance Tip | Benefit |
|---|---|
| Regular cleaning | Prevents issues and ensures efficiency |
| Protective covers | Reduces moisture-related damage |
| Off-peak hour charging | Leads to savings of up to 40% on electricity costs |
Conclusion and Final Thoughts
Installing a built-in charging station changes the game for electric vehicle owners. It makes charging at home easy and saves money. Plus, it adds safety features. Homeowners can enjoy the latest tech by planning and installing carefully.
Studies show wireless charging stations boost local businesses. They lead to more spending and visitors. This shows how good they are for our planet. DIY fans should be careful and safe while installing. This way, everyone can enjoy safe and easy charging for a long time.
FAQ
What is a built-in charging station?
What are the benefits of using a built-in charging station?
How do I choose the right location for my built-in charging station?
What types of built-in charging stations are available?
What tools and materials are needed to install a built-in charging station?
How do I prepare for the installation of a built-in charging station?
What are the steps to install a built-in charging station?
How do I test my built-in charging station installation?
What safety tips should I follow when using a built-in charging station?
How do I maintain my built-in charging station?
Source Links
- https://www.thespruce.com/installing-electric-car-charger-at-home-6504202
- https://qmerit.com/blog/want-to-install-an-ev-charging-station-at-home-heres-why-quality-matters-even-when-using-the-right-materials/
- https://en.wikipedia.org/wiki/Charging_station
- https://www.bretford.com/solutions/charging-stations-and-smart-hubs/
- https://www.xmap.ai/blog/strategies-for-selecting-ideal-locations-for-ev-chargers-building-an-efficient-and-comprehensive-network
- https://evchargingsummit.com/blog/how-to-choose-the-optimum-site-for-your-ev-charging-station/
- https://bacancysystems.com/blog/types-of-ev-chargers
- https://afdc.energy.gov/fuels/electricity-stations
- https://chargelab.co/blog/level-1-vs-level-2-vs-level-3-charging
- https://www.anikasdiylife.com/diy-battery-charging-station/
- https://www.instructables.com/Ultimate-Drill-Charging-Storage-Station/
- https://www.makingathome.com/0028-tool-charging-station
- https://ampup.io/blog/the-electricians-guide-to-fast-ev-charger-installation
- https://www.nyserda.ny.gov/-/media/Project/Nyserda/Files/Publications/Research/Transportation/ChargeNY-Electric-Vehicle-Charging-Station-Installers-Best-Practices.pdf
- https://afdc.energy.gov/fuels/electricity-ev-readiness
- https://blog.probuscars.be/electric/guide-to-installing-home-electric-vehicle-charger/
- https://www.etek-electric.com/blog/how-to-install-ev-charging-station
- https://chicagoev.com/how-to-test-an-ev-charger/
- https://afdc.energy.gov/fuels/electricity-infrastructure-development
- https://evbox.com/en/are-home-charging-stations-safe
- https://www.thehartford.com/insights/home-workplace-safety/ev-charging
- https://blog.evsolutions.com/charger-care-keeping-your-home-ev-charging-station-in-top-shape
- https://www.rootelectric.com/ev-charging-station-maintenance-tips/
- https://pmc.ncbi.nlm.nih.gov/articles/PMC11375121/
- https://www.energy.ca.gov/sites/default/files/2021-06/CEC-500-2019-036.pdf